Connecting a CD/DVD Drive
Connecting the CD/DVD drive

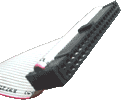
Almost exactly the same procedure is used here to connect the CD-ROM. Take the wider, '40way Ribbon' cable and connect one end (either will do - no twist this time) to the 40 pin connector on your CD-ROM. Note this time that the pink line must be next to where the CD-ROM Power connector is located. The Power connector on the CD-ROM is a deep white socket with 4 big pins inside.
Once the connection to the CD-ROM is made, locate the specific connector on the Motherboard for Secondary IDE. Your Motherboard manual will help you find this. In this case, the CD-ROM must be connected to the Secondary IDE socket. Again, the connector will be 'keyed' for correct alignment.
Need Help?
Read our IDE configuration crash course

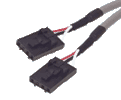
Finally, if you have a sound adapter in your system, don't forget to connect the CD-audio cable. Don't worry if you don't have one, your local PC hardware store should have plenty. Simply connect one end of the cable to the back of the CD-ROM, next to the IDE cable, then connect the other end to your sound cards 'CD-IN' connector. If your Motherboard has on-board audio, the 'CD-IN' connector will be located on the Motherboard somewhere. Check the Motherboard manual for its location.